

How to Wash Cosmetic Brushes The Right Way
It’s taken me many years, and much trial and error, to figure out how to wash cosmetic brushes the most effective way. I’ll be honest and admit that washing my makeup brushes is one of my least favorite chores. It’s time-consuming, annoying to do, and sometimes it feels like the effort isn’t always worth it.
The reality is that so much product, oil, and bacteria can quickly build up on your brushes—and when you’re not cleaning them regularly, you’re just spreading all that gunk all over your face every time you use them unwashed. Not only can dirty makeup brushes affect your skin, but they can also affect how smoothly and evenly your makeup is applied.
In this guide, I will walk you through how to wash cosmetic brushes properly, what to use, and how often to do it, too.
How to Wash Cosmetic Brushes
As annoying as it is, a clean makeup brush can make or break (out) your skin and makeup look. If you have sensitive or acne-prone skin, it’s super important to wash your brushes regularly to avoid further irritation. Dirty makeup brushes can easily lead to buildup, clogged pores, and uneven makeup application. Plus, cleaning your makeup brushes properly not only keeps the brushes sanitary, but it also extends the life of your precious brushes, too.
Why Wash Makeup Brushes?
Prevent bacteria buildup and skin irritation
Unwashed makeup brushes are an absolute breeding ground for bacteria. Especially considering how infrequently folks actually wash their makeup brushes, I’d be nervous to see how much bacteria you’re actually spreading all over your face every time you use an unwashed brush. Not only are you irritating your skin with all that bacteria, but you’re also probably adding bacteria to your makeup whenever you drip your brush into it. Yikes!
Improve makeup application and blending
So often, I’ll use a foundation brush multiple times without washing it, and notice how patchy my foundation looks after applying it to my skin. This is usually because the brush gets dirty and has caked bristles that make blending not as smooth.
Maintain brush quality and shape
I remember when I was in high school, I spent a pretty penny on a full set of Sigma makeup brushes. That was almost 20 years ago, and I still use some of those makeup brushes to this day. Keeping your makeup brushes relatively clean helps extend their wear and keeps their shape well, so that you don’t end up with a wonky eyeshadow brush that somehow applies shadow everywhere but your lid.
Reduce product buildup and color mixing
This is a common thing I deal with whenever I don’t wash my brushes. Especially when it comes to my blush and highlighter. Sometimes I use the same brush for both those products, and I end up getting highlighter on my cheeks when I only really wanted a wash of blush for that look. Keeping your brushes clean helps avoid any sort of product buildup over time and accidentally mixing colors, which could totally derail your look!

How Often Do You Need To Wash Makeup Brushes
Foundation and concealer brushes: once per week
I’ll bet that you probably use your foundation and concealer brushes the most out of all your brushes throughout the week. Your foundation brush will sweep across your entire face each time you use it, which means it could be spreading a lot of bacteria all over your skin if not washed regularly. If you can, I would try to wash your foundation and concealer brushes every week. And if you can’t make that happen, at least wash them once every two weeks!
Eye makeup brushes: every 1 to 2 weeks
You probably use these brushes pretty often as well, but they don’t cover as wide of an area as, say, your foundation brushes. I would recommend washing these at least once every two weeks so you’re not spreading bacteria around your eyes.
Powder brushes: every 2 to 3 weeks
Because powder brushes don’t have liquid on them, it’s a lot easier to wipe off the residue once you’re done using them. I think it’s safe to say that you can wash these every two to three weeks, depending how often you use them.
Here’s a more thorough blog post about how often to clean makeup brushes if you’re looking for more info!
What To Wash Makeup Brushes With
EcoTools Makeup Brush Cleanser + Sponge Shampoo
Available on Amazon ($8)
This is one of my favorite makeup brush cleaners, and one I reach for most of the time. It’s gentle, fragrance-free, and does a great job of removing all the buildup and junk off your makeup brushes.
Dr. Bronner’s Baby Unscented Pure-Castile Liquid Soap
Available on Amazon ($10)
This pick from Dr. Bronner’s is another great option. It’s gentle and suds up really nicely—a little goes a long way!
EcoTools Makeup Brush Cleaner Pad
Available on Amazon ($8)
I don’t wash my makeup brushes without using a cleaner pad to rub the brushes against. It makes a huge difference in how clean my brushes get. Before I discovered cleaner pads for makeup brushes, I used to use the palm of my hand to clean out the brushes and it would take forever. These pads are way more efficient.
How To Wash Makeup Brushes
Step 1: Wet bristles with lukewarm water
Hold your brush bristles-down under a stream of lukewarm water, making sure to only wet the bristles and not the ferrule. That’s the metal part that connects the bristles to the handle. Water that gets into the ferrule can loosen the glue that holds the bristles in place over time, so keep the handle tilted slightly downward so water runs away from it.
Step 2: Apply a small amount of cleanser
Apply a small, pea-sized amount of brush cleanser or gentle soap directly to the bristles or the brush cleaner pad. palm of your hand.
Step 3: Gently swirl and lather
Swirl the brush in gentle circular motions against the palm of your hand or a brush cleaning mat to work the cleanser through the bristles and break down any product buildup. Be gentle here—scrubbing too aggressively can damage the bristles, especially on more delicate eyeshadow brushes.
Step 4: Rinse thoroughly until water runs clear
Hold the brush bristles-down under lukewarm running water and rinse the brush until the water running off is completely clear with no trace of color or product. If the water isn’t running clear after the first rinse, repeat steps two and three before rinsing again.
Step 5: Gently squeeze out excess water
Use your fingers to gently squeeze the excess water out of the bristles from the base down to the tips. You never want to twist or wring them, as this can distort the shape and damage the brush over time.
Step 6: Reshape the bristles and lay flat to dry
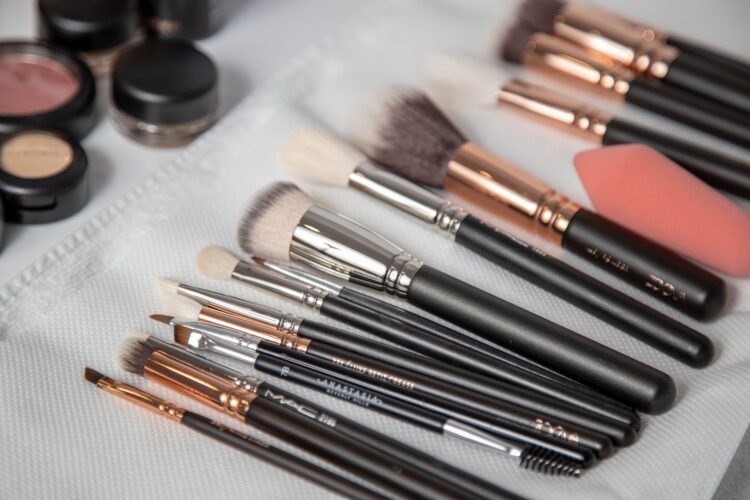
Reshape the bristles back into their original form with your fingers, then lay your brushes flat on a clean towel to dry with the bristles hanging slightly off the edge so air can circulate. Never stand them upright in a cup to dry since water can drip down into the ferrule and loosen the glue.
How To Dry Makeup Brushes
Lay brushes flat on a clean towel
After reshaping your bristles, lay your brushes flat on a clean, dry towel to dry rather than standing them upright or tossing them in a drawer. Laying them flat ensures that the weight of the wet bristles doesn’t pull them out of shape as they dry, and it allows air to circulate around the brush evenly so the drying process is more thorough.
Let bristles hang slightly off the edge if possible
If you can, position your brushes so that the bristles hang slightly off the edge of your counter or towel while they dry. This allows air to circulate all the way around the bristles rather than just on the top side, which helps dry your brushes faster and more evenly. It also prevents the bristles from getting flattened or misshapen from resting against the towel surface for hours while wet.
Avoid drying upright to prevent water damage
This is probably the most important drying tip of all. Never stand your brushes upright in a cup or brush holder to dry. When brushes dry upright, any remaining water in the bristles drips down directly into the ferrule and loosens the glue that holds everything together over time. This is what causes excessive shedding and is one of the most common reasons that even good quality brushes fall apart prematurely.
I hope you’ve found this guide on how to wash cosmetic brushes helpful! Now that you’ve got your brushes all cleaned, it’s time to put them away! Here’s a great guide on how to store makeup brushes for easy access.