
How to Get Perfect Heatless Waves Overnight
I have been perfecting the heatless waves overnight look for as long as I can remember. When I was in grade school, I’d ask my mom to put my hair in those (super uncomfortable) spongy rod rollers multiple nights a week. I loved sporting my curly-Qs at school.
Nowadays, I prefer a look that’s less Shirley Temple and more Blake Lively. While I do like to use my Dyson Airwrap to create curls and waves every now and then, I favor going damage-free over using hot tools when I can.
Nail The Heatless Waves Overnight Look
My fiance bought me the Kitsch Satin Heatless Curling Set for Christmas so that I could create heatless waves overnight. I’ve experimented with this tool a bunch since I got it, and I love how it makes my hair look. I get so many compliments on my hair every time I use this curling set.
It’s really simple to use (once you get the hang of it). And I don’t have issues sleeping in it overnight. I have pretty long hair, so I don’t know how it would look on folks with short to medium hair. I once tried using it with wet hair, and I found that my hair didn’t really dry enough overnight. My best advice would be to use this on almost dry hair. Your hair should still be able to hold the wave in the morning.

Tools You’ll Need
- Kitsch Satin Heatless Curling Set
- Medium-sized claw clip
- Curl cream
- Optional: smaller claw clips and bobby pins
How to Create Heatless Waves Overnight
Step 1:
Depending on how well your hair holds a curl, you want to start with almost dry hair. I have found that my hair doesn’t dry fast enough throughout the night if I do this technique with damp hair. For those with really fine, thin hair, I think it’s okay to try to create heatless waves overnight with damp hair.

Step 2:
Apply some sort of curl cream or mousse in your hair while it’s damp or nearly dry. This will allow your hair to hold the wave for longer, add shine, and reduce frizz. I really love the JVN Complete Hydrating Air Dry Cream (sephora.com, $26). It works wonders in holding my waves and you really don’t need a lot.
Step 3:
Place the satin curling rod on top of your head, a little further back (behind your ears). I prefer to place the rod further back on my head. I’m a side sleeper and it’s easier to sleep when it’s not pressing right against my ear.
Step 4:
Use a claw clip to secure the satin rod to your hair at the top. This will probably feel a little bit loose, so don’t worry about it too much.
Step 5:
Divide your hair down the middle in the back of your head. I like to use a plain ole parting comb for this. This will make it easier to get all the hair onto the rod on each side of your head.
Step 6:
Begin the process. I like to watch this video on TikTok almost every time I create my heatless waves overnight look. I prefer this method (rather than wrapping your hair all in the same direction around the rod) because it makes more of a loose wave pattern and creates waves in different directions. You want to take pieces of your hair, from the front of the rod and the back of the rod, and then cross them over each other above the rod. Then do the same thing, but cross them below the rod. Continue to do this until you have about 2-3 inches of hair left.
To be able to create heatless waves overnight, rather than tight curls, you want to wrap your hair around the rod a little bit loosely. Additionally, if you do this with mostly dry hair, you won’t end up with the tight curls that you can sometimes see when using one of these tools.
Step 7:
Personally, I like to keep about 2-3 inches of hair uncurled because it looks more lived-in and beachy if you don’t have the ends curled. Once you’ve gotten to the bottom, use the included scrunchies to secure your hair onto the rod. Sometimes I like to use bobby pins or smaller claw clips to secure the hair closer to the back of my head onto the rod. This ensures that it won’t fall out in the middle of the night.
Step 8:
Go to sleep!
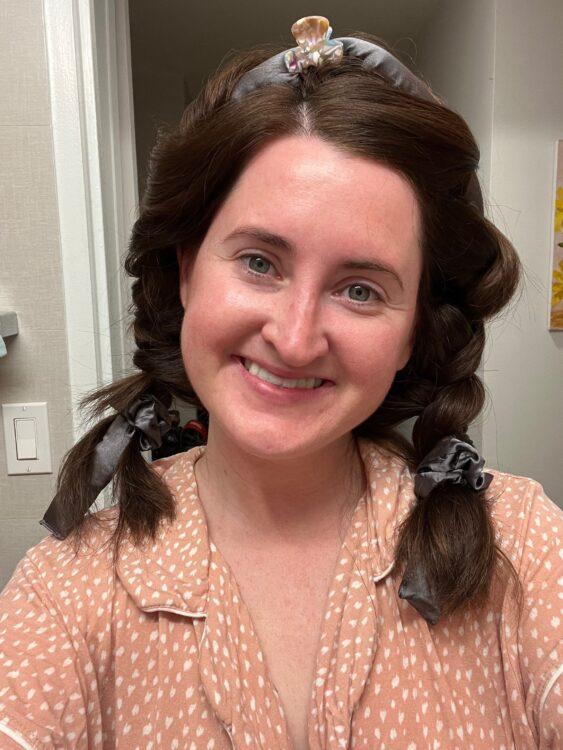
Step 9: Wake up and take your satin curling rod out! Run your fingers through the waves. If your hair appears too curly, make sure to run your fingers through the curls to separate them and make them more into a wave look. You could also use a brush or wet a brush and run it through your hair to tame the curls a bit. If you wrap your mostly dry hair loosely around the rod, you should end up with waves in the morning!
Before and After Photos

Where to Buy
You can purchase the Kitsch Satin Heatless Curling Set from multiple retailers!
Kitsch ($16)
Ulta ($16)
Macy’s ($18)
Anthropologie ($16)
Urban Outfitters ($16)
Nordstrom ($18)
*This post contains affiliate links. I may earn a small commission when you make a purchase through the links on my site at no additional cost to you. Thank you so much for supporting my small business by shopping through my affiliate links—I am so appreciative!